Thứ Tư, 25 tháng 5, 2016

How to install VNC server on Centos 7

VNC server is used to connect and control desktop environment of the server from remote clients. VNC viewer is used on remote computer to connect the server .
In the article we can learn about how to install vnc server on centos 7 . we can use the default packages provided in the centos yum repository.

Install vnc server on centos 7

Let’s start. If you don’t have desktop environment ( X windows ), issue the below commands one by one to install. It will take few minutes to install packages.
[root@krizna ~]# yum check-update
[root@krizna ~]# yum groupinstall "X Window System"
[root@krizna ~]# yum install gnome-classic-session gnome-terminal nautilus-open-terminal control-center liberation-mono-fonts
[root@krizna ~]# unlink /etc/systemd/system/default.target
[root@krizna ~]# ln -sf /lib/systemd/system/graphical.target /etc/systemd/system/default.target
[root@krizna ~]# reboot

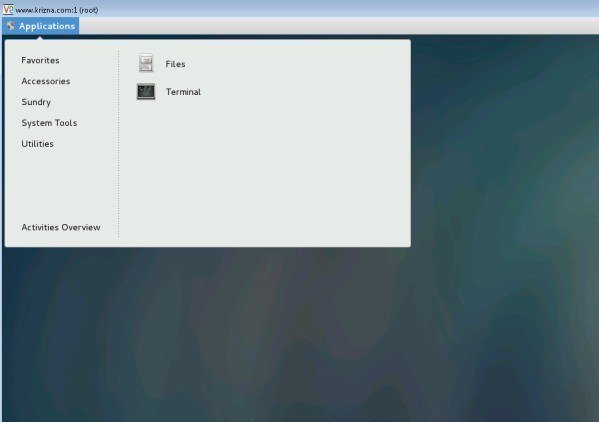
After reboot, you will get Centos 7 desktop .
Now start installing VNC packages.
Step 1 » Issue the below command to install VNC package.
[root@krizna ~]# yum install tigervnc-server -y
Step 2 » Create a file vncserver@:1.service in /etc/systemd/system/ directory by copying example config file /lib/systemd/system/vncserver@.service
[root@krizna ~]# cp /lib/systemd/system/vncserver@.service /etc/systemd/system/vncserver@:1.service
Step 3 » Now open /etc/systemd/system/vncserver@:1.service file and replacewith your username .
Find these lines ..
ExecStart=/sbin/runuser -l <USER> -c "/usr/bin/vncserver %i"
PIDFile=/home/<USER>/.vnc/%H%i.pid

Replace ( Considering username as john )
ExecStart=/sbin/runuser -l john -c "/usr/bin/vncserver %i"
PIDFile=/home/john/.vnc/%H%i.pid

If you are creating for root user .
ExecStart=/sbin/runuser -l root -c "/usr/bin/vncserver %i"
PIDFile=/root/.vnc/%H%i.pid

Step 4 » Reload systemd for changes.
[root@krizna ~]# systemctl daemon-reload
Step 5 » Create VNC password for the user .
[root@krizna ~]# vncpasswd
Step 6 » Enable and start the service using the below commands.
Enable service at startup ( Permanent ).
[root@krizna ~]# systemctl enable vncserver@:1.service
Start the service .
[root@krizna ~]# systemctl start vncserver@:1.service
Step 7 » Allow VNC service in firewall.
[root@krizna ~]# firewall-cmd --permanent --add-service vnc-server
[root@krizna ~]# systemctl restart firewalld.service

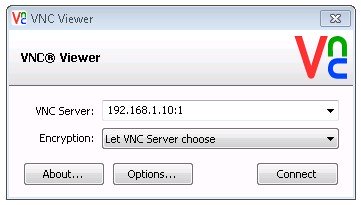
Now you can able to connect VNC server using IP and Port ( Eg : 192.168.1.10:1 )
install vnc server on centos 7
install VNC server Centos 7
You can use VNC client like Tightvnc viewer and Realvnc viewer to connect Server.
For additional users create files with different ports ( Refer Step 2 )vncserver@:2.service by copying example config file and continue the steps 3,4,5 and 6 by replacing service name. Please make sure you logged in as that particular user for creating vnc password ( Step 5 ).

Additional Commands :

» To stop VNC service .
[root@krizna ~]# systemctl stop vncserver@:1.service
» To disable VNC service from startup ( permanent ).
[root@krizna ~]# systemctl disable vncserver@:1.service
» To stop firewall ( For troubleshooting ).
[root@krizna ~]# systemctl stop firewalld.service

Source: http://www.krizna.com/centos/install-vnc-server-centos-7/

Thứ Tư, 23 tháng 3, 2016

ORA-00838: Specified value of MEMORY_TARGET is too small

ORA-00838: Specified value of MEMORY_TARGET is too small, needs to be at least 3072M – Oracle 12c


Today morning, I got new excitement with oracle error: ORA-00838. Error message itself self-explanatory.

Cause: Existing MEMORY_TARGET value not enough to start database.

Solution: Increase MEMORY_TARGET value.


Consider following workaround:

[oracle@12c bin]$ sqlplus “/ as sysdba”

SQL*Plus: Release 12.1.0.1.0 Production on Mon Jun 9 11:15:45 2014

Copyright (c) 1982, 2013, Oracle. All rights reserved.

Connected to an idle instance.

SQL> startup
ORA-00838: Specified value of MEMORY_TARGET is too small, needs to be at least 3072M

// As we know spfile isn’t human readable or editable, create pfile from spfile. So that we able to change oracle system parameter. ( i.e. MEMORY_TARGET )

SQL> create pfile=’/tmp/pfile.bac’ from spfile;

File created.

// After file has created, change MEMORY_TARGET parameter value from pfile.

[oracle@12c ~]$ nano /tmp/pfile.bac
*.memory_target=3072M

// Start oracle database with newly updated pfile as follows.

[oracle@12c ~]$ sqlplus “/ as sysdba”

SQL*Plus: Release 12.1.0.1.0 Production on Mon Jun 9 11:24:56 2014

Copyright (c) 1982, 2013, Oracle. All rights reserved.

Connected to an idle instance.

SQL> startup pfile=/tmp/pfile.bac

ORACLE instance started.

Total System Global Area 3206836224 bytes
Fixed Size 2293496 bytes
Variable Size 1879048456 bytes
Database Buffers 1308622848 bytes
Redo Buffers 16871424 bytes
Database mounted.
Database opened.

// Create spfile from newly created pfile. As we are using spfile for our database.

SQL> create spfile from pfile=’/tmp/pfile.backup’;

File created.

// Bounce the database after creating spfile to reflect changes in environment.
SQL> startup force;
ORACLE instance started.

Total System Global Area 3206836224 bytes
Fixed Size 2293496 bytes
Variable Size 1879048456 bytes
Database Buffers 1308622848 bytes
Redo Buffers 16871424 bytes
Database mounted.
Database opened.

// Ensure changes by following command.

SQL> show parameter memory_target

NAME TYPE VALUE
———————————— ———– ——————————
memory_target    big integer    3G

Thứ Ba, 22 tháng 3, 2016

Query an external MS Access DB from an Oracle DB

Version of Oracle: 11g -> 11.2.0.1.0
Version of Windows: Windows Server 2008
Steps to complete:
  1. Create System DSN with Microsoft Access Driver
  2. Modify listener.ora file
  3. Create the file initaccess.ora
  4. Modify tnsnames.ora file
  5. Restart listener
  6. Check connection with access database
  7. Create the DB Link in Oracle
STEP 1: Create system DSN
First go to ODBC Data Source Administrator click on System DSN tab. The create a DSN with the following parameter (you can choose the name link that you prefer but then you need to keep the same name all over the process). Link creation
In our case:
  • Driver: Microsoft Access Driver (*.mdb,*.accdb)
  • Name: access
  • Description: (doesn't matter)
  • Database -> Select -> (Select the .accdb or .mdb database)
  • Save the configuration
  • Make sure you see this listed once you save it:
    Name - Driver
    access - Microsoft Access Driver (*.mdb,*.accdb)
STEP 2: Modify listener.ora file
Let's locate the file. In our case:
  • E:\app\Administrador\product\11.2.0\dbhome_1\NETWORK\ADMIN
We need to add the following text at the end. By the way, look at I posted as 'oracle_home' the directory in C: drive. That's because I had more than one directory related to Oracle, and I still don't understand it but worked in my case. Maybe in yours there's only one.
Parameters you need to modify:
In first block:
  • SID_NAME: name chosen in the step above. The name of the dsn created ('access' in our case)
  • ORACLE_HOME: Home directory of Oracle
  • PROGRAM = dg4odbc (I think that from Oracle 11g and beyond, 'dg4odbc' is mandatory.
In second block:
  • HOST: The name of the hostname (not sure if localhost' or an IP address are supported, but I guess they are)

SID_LIST_LISTENER =
  (SID_LIST =
    (SID_DESC=
      (SID_NAME = access)
      (ORACLE_HOME = C:\app\Administrador\product\11.2.0\dbhome_1)
      (PROGRAM = dg4odbc)
    )
  )

LISTENER =
  (DESCRIPTION_LIST =
    (DESCRIPTION =
      (ADDRESS = (PROTOCOL = TCP)(HOST = host_name)(PORT = 1521))   
    )
  )

Make sure there is no space before 'SID_LIST_LISTENER' or 'LISTENER' in the file you modify:
listener.ora file
STEP 3: Create the initaccess.ora file
Go to:
  • E:\app\Administrador\product\11.2.0\dbhome_1\hs\admin
There, make a copy of 'initdg4odbc.ora' file (I deleted it after I made a copy). Add the following text to the file:
HS_FDS_CONNECT_INFO = access 
HS_FDS_TRACE_LEVEL = 0
  • HS_FDS_CONNECT_INFO: Here we write the name of the link created in the ODBC source tool in the first step, so it's 'access'
  • HS_FDS_TRACE_LEVEL: Leave it with a 0
enter image description here
STEP 4: Modify tnsnames.ora file:
Let's locate the file. In our case:
  • E:\app\Administrador\product\11.2.0\dbhome_1\NETWORK\ADMIN
Parameters to modify:
  • HOST: hostname of the server
  • SID: this is the name of the 'initaccess.ora' file BUT taking away the 'init' part and '.ora' file extension: then 'access'.
  • (HS=OK) = don't forget this.

access =
  (DESCRIPTION =
    (ADDRESS = (PROTOCOL = TCP)(HOST = host_name) (PORT = 1521))
    (CONNECT_DATA =
      (SID = access)
    )
    (HS=OK)
  )

Be sure that you don't leave spaces before the 'access =' parameter.
tnsnames.ora file
STEP 5: Restart the listener
  • Open a command line terminal
  • Go to: C:\app\Administrador\product\11.2.0\dbhome_1\BIN
  • Stop the listener
    • C:\app\Administrador\product\11.2.0\dbhome_1\BIN>LSNRCTL.EXE stop
    • You should see a message saying it was successfull
  • Restart the listener
    • C:\app\Administrador\product\11.2.0\dbhome_1\BIN>LSNRCTL.EXE start
    • You should see a message saying it was successfull
    • You should also see, (in the output, when restarting the server) a message talking about the 'access' service we just added
El servicio "access" tiene 1 instancia(s).
La instancia "access", con estado UNKNOWN, tiene 1 manejador(es) para este ser vicio...
El comando ha terminado correctamente
STEP 6: Test connection with the access database
  • Open a command line terminal
  • Go to: C:\app\Administrador\product\11.2.0\dbhome_1\BIN
  • Run tnsping.exe (as argument, pass the name of the link: 'access'):
  • C:\app\Administrador\product\11.2.0\dbhome_1\BIN>tnsping.exe access
  • You should see a message saying it was correctly run and displaying the delay in msecs

TNS Ping Utility for 64-bit Windows: Version 11.2.0.1.0 - Production on 06-JUN-2
014 11:04:35

Copyright (c) 1997, 2010, Oracle.  All rights reserved.

Archivos de parßmetros utilizados:
E:\app\Administrador\product\11.2.0\dbhome_1\network\admin\sqlnet.ora


Adaptador TNSNAMES utilizado para resolver el alias
Intentando contactar con (DESCRIPTION = (ADDRESS = (PROTOCOL = TCP)(HOST = CUPCA
KE) (PORT = 1521)) (CONNECT_DATA = (SID = access)) (HS=OK))
Realizado correctamente (20 mseg)
STEP 7: Create the DB Link in Oracle and query the Ms Access database:
Create the DB Link (always as **sys):**
CREATE public DATABASE LINK accessdblink USING 'access';
* 'access': Same name as in tnsnames.ora -> 'access = '
Query the database:
SELECT * FROM table_name@accessdblink;
Source: http://stackoverflow.com/questions/24081001/how-to-query-an-external-ms-access-db-from-an-oracle-db